 Since finishing this project I have worn it once as a skirt and twice as cowl. I’m liking it very much in both areas. Though I think I like it just a bit more as a cowl. Unfortunately, not even adding a second color got the cowl to be long enough to also work as a hood.
I finished the pattern as originally called out, which surprised me a little, though I do have a tendency to crochet a bit tight. I still had some of the flax colored yarn left, so I added a few extra single crochet rows after realizing that I didn’t have enough to add a full row of star stitches.
I sewed up the side and tried it on and, as I suspected, it was not long enough for me to comfortably wear as a skirt. I looked through my color options and chose Patons Silk Bamboo in Sapphire. I had two skeins of this particular yarn and I thought I could probably add a three more rows of star stitches. Not to mention it was shiny like the flax colored yarn.
Unfortunately, I had a bit of trouble getting the star stitches to work since I was trying to do them in the round instead of going side to side and I was working from the starting edge. I probably could have crochet a set and then stitched it to my finished piece, but ended up just doing single crochet stitches instead to give a smoother finish for the part that would likely end up covered by a shirt anyway. The bamboo yarn was also slightly thinner than the Bernat Soy Natural Blends, which also contributed to my deciding to just do single crochet.
I added two rows to the starting edge for accent. Then I flipped to the other end and added 7 rows of single followed by a row of double crochets done with four double crochets followed by a chain 1 and skipping the next stitch to create a space. I then finished it off by adding one more row of single crochets and ran a ribbon through the spaces.
I’m pretty proud of the result and I love the vibrancy of the sapphire against the flax. It’s also nice to have a cowl in a different color palette than my pink and black one so I can always have something warm around my neck without clashing too horribly.
And as noted in my WIP from last week, the original pattern can be found here.

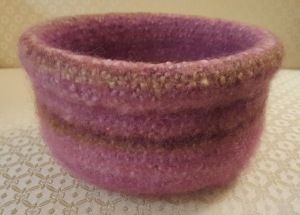 This bowl is the only one that didn’t felt nearly as much as I wanted. I can still see the stitches pretty well, but it has definitely shrunk a fair amount.
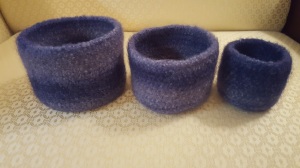 I finally got around to felting all the bowls to my satisfaction. I initially tried felting the bowls in my washing machine, but they didn’t seem to want to felt. I was worried that they wouldn’t come out since the yarn was a blend of soy and wool. So, I also tried felting them by hand, which produced better results, but they still didn’t seem to be felting as much as I was hoping for.
 Due to some rather unfortunate incident I no longer have a bath mat. At the moment I’m using some towels on the floor, so when I came across a pattern in One Skein for a bath mat and I eyed the six skeins of Sugar & Cream in Cream sitting on my shelf, I couldn’t help but grab a hook and start on my way.
 I finished my Christmas Tree a few days before Christmas. You can see it here in it’s undecorated glory. I ended up taking it apart a second time when I realized I was adding too many rows in between the branch rows past the first three, which I also noticed after I started taking apart the last two branch rows when I noticed I forgot a row on the branches so it was a bit shorter than the others.
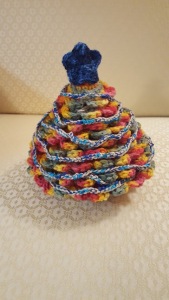 Because the rows were really close together I decided to forgo adding beads as ornaments and instead just made a star and garland to put around the tree. You might recognize the colors of the garland from my
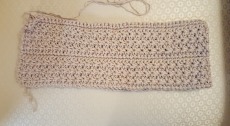 The yarn I’m using is Bernat Soy Natural Blends in Flax. Which, as per most of my yarn hoard, is a discontinued style. It is a 50% soya and 50% acrylic combo. The yarn is very soft and has a bit of a shine too it. As it stands in the picture I’m a bit over halfway through my yarn and it definitely doesn’t seem like it’s going to be nearly long enough to cover my behind.
 Instead I ended up picking out a yarn that I thought was fun and sort of Christmas-y since it had red and green as two of the main colors in the yarn. So here is my still in progress colorful Christmas Tree.

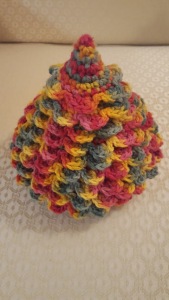
 I originally wanted to do the scales all the way up the whole cape, but realized that it was going to be way shorter than I wanted if I did that, so I followed the general pattern from the cowl and hood. So, as you can see I have some of the crocodile stitch along the bottom (7 rows total) and then several rows of straight double crochet done through the backloops after the initial row.
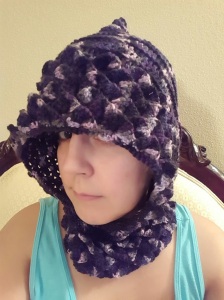 And thus we have my Dragon Scale Hood (aka Crocodile Stitch Hood). It was a lot of fun to make and I decided to use a variegated yarn so that no two scales would look the same. The yarn I used is Lorna’s Laces in Black Purl.
